Wednesday, January 25, 2012

bake52: week 4-- Light Cheesecake

This week at bake52 we made Light Cheesecake.  Talesha of Sugar and Spice and Other Things Nice hosted

I was very un-trusting of this recipe-- LIGHT cheesecake??  Then, looking over the ingredients, I became increasingly nervous... Cottage cheese???  Yogurt cheese? {I didn't even know what that was!} Luckily, Jennifer mentioned on our bake52 facebook page that she had used Greek yogurt in place of the yogurt cheese with good results.  I used that instead of the yogurt cheese and also thought it was good substitution!

I bought all of the ingredients and went to work Monday morning.  One step is to drain the cottage cheese:

...which was so funny looking to me.  :)

I loved how much of the cheesecake came together so quickly and was done in a food processor!!  It really was easy.  


Easy and pretty! 

That is....
... until a certain naughty three year old found it cooling on the counter and decided to sample it!!!  The little stinker.  But, once again, we have a kid-pleasing recipe! :)

I liked it, I thought it was tangier than a regular cheesecake which was fine with me.   Once it set up it wasn't runny like in the picture above-- it hadn't finished cooling yet when the three year old attacked!  My kids loved it, and my husband thought it was great. 

Hop over to Sugar & Spice for the recipe!  


Wednesday, January 18, 2012

bake52: week 3-- Boston Cream Cupcakes

 This week bake52 is being hosted by our founder, my sister in law Amanda of girlplusfood.blogspot.com!  Amanda is my husband's little sister, and I have always said that the biggest perk of marrying him was getting her as a sister.  She really is the best and I love her to death.  {honestly!}

Now, that being said, when I saw that she picked this recipe, my first thought was.....

"Oh, give me a break!" 

Why??  Because my husband's favorite dessert in the world is Boston Cream Pie!!  I was instantly hit with a big case of wife guilt!  I am hosting bake52 in March, and guess what I picked... Creme Brulee... because it's MY favorite dessert!!  I hadn't even thought of looking for Boston Cream anything!  I totally accused Amanda of trying to be guilt inducing and she DID admit to thinking that Ryan would love these.  :)

The recipe was a process!!  First you made the custard/cream for the filling.  Then the cupcake itself.  And last, the chocolate glaze.  Then you assemble!

While I was making the cupcake I was getting a little worried.  I have to admit to being a total cupcake-out-of-a-box-mix kind of girl up until this point, and all of those cupcakes were really light and airy in texture.  I was picturing those and wondering how this recipe would work out-- it has you cut out a circle on the top of the cupcake, scoop out the cake inside, fill with cream, then replace the top.  These cupcakes, however, are so sturdy!  The texture reminded me more of a cornbread muffin or something. 

 {cupcakes baked and cooling!}

 {Glazed with the chocolate}


 {After cooling, the chocolate set up and sealed the tops so you couldn't see it had been cut}

{a shot of the inside, cream filled!  yum!}

I love how in a lot of those pictures, you can see little arms hanging out right on the edge of the pictures... these things smelled amazing while I was preparing them and my three children were DYING to get one!!!  While I was making them, our little neighbor stopped by and was watching me put them together.  She said in a wistful voice, "If I lived in this house I would eat one of those cupcakes later on tonight...."  It was so cute!!  I totally had to run a plate nextdoor and let her try some.

These cupcakes were a huge hit at our home and I think what I loved about them is how show-stopping they are!!  They look like an amazing about of work went into them {and let's face it, an amazing amount did!}  They are something I am definitely going to make again for special occasions-- like my husband's birthday!!! 

You can find the recipe here on Amanda's blog! 
girlplusfood.blogspot.com/2012/01/bake-52-boston-cream-cupcakes.html

Wednesday, January 11, 2012

bake52: week 2-- Bran Muffins


bake52 this week is being hosted by Valerie!  She knew we were all going to be in a sugar coma after the holidays and selected Bran Muffins for us to make this week. 

Like last week's Quiche, one of my first thoughts was-- "My kids will never eat these!"  But like last week's Quiche-- they gobbled them up!  I was so surprised but this recipe was also a kid pleaser at my house.  I bet everyone is going to stop believing me now when I say that they are picky eaters! :)

 When I was working on making the recipe, I got to this stage and wondered if I had done things right.  I'd doubled it to make 24 muffins, and the batter was just so sticky and thick I was picturing them coming out of the over like little bran rocks!!  I was really nervous.  I was so surprised when they transformed into light and moist muffins!  Surprised and relieved.  How embarrassed would I have been to get kicked out of the making group on week two for failing at Bran Muffins?? 

 I was reading in the muffin section of the book and they suggested forgoing muffin tin liners-- I had never done that before but they really did do just fine without the paper liners. 

 They almost look like little balls of ice cream to me in this photo!


 Here is a close up of the muffin-- I was so surprised at the light and moist texture!

All ready to serve! 

I'm not sure if the chocolate color fooled the kids into suspending judgement on these or what, but they really did eat them up.  My 4th grader even specifically requested that I put them in his lunch the next day.  To me, they had a strong bran flavor with hints of molasses.  I liked the raisin plumping technique the recipe took you through, and will be doing that to my oatmeal cookies too from now on!  You can go to Valerie's blog here for the recipe: http://sugarcoatedsaga.blogspot.com/2012/01/week-2-bran-muffins.html

I am already getting exited for next week: Boston Cream Cupcakes!  Yum!  Good thing we got our fiber in while we could!!


Wednesday, January 4, 2012

bake52: week 1-- Quiche

Our first week of bake52 is here!  This week is being hosted by the cute Clare of Adventures of Tyler & Clare.  She picked  Quiche. 

As I was looking through the recipe, I realized it was really two recipes in one!  You also had to select a pie crust to use.  As I was looking over the options, I was wondering about using my standard pie crust recipe-- one that was handed down to me from my mom and that she got from her friend-- and it's pretty amazing.  I went ahead and used one from the book, though, because I wasn't sure if I could substitute my own for our group!  I wanted to play by the rules and make sure I didn't make my sister-in-law, the brains behind bake52, mad!!  ha! 

I am so glad I tried the new crust recipe, though!!  It was AMAZING.  Really sturdy, great texture, amazing flavor, and so easy to make.  It's all done in the food processor and couldn't be any easier! 


 I loved the quiche.  It was so tasty and had a peppery taste that I really enjoyed that I haven't always noticed in other quiches.  I served it for dinner and my whole family gobbled it up-- even my youngest two who are picky, hard to please little princesses!!  My son was even calling it "egg pizza" and asking for more!!

HUGE success!! 

 I made the quiche in a tart pan instead of a pie plate for a pretty presentation, and it worked out perfectly!  I was a little worried tinkering with the recipe that way wouldn't leave me with good results, but it was wonderful! 

 You can find the recipe at Clare's site here: http://tylerandclare.blogspot.com/2012/01/bake-52-week-1-quiche.html
Enjoy!! 

Tuesday, January 3, 2012

Pink Paris Bedroom

My youngest two are girls, and they are the sweetest sisters to each other.  Every night as I would check on them before I went to bed, I would see that one of them had gone into the others room-- and they would be cuddled up in the same bed, asleep!  It was the sweetest thing to see every night, and it gave me an idea for Christmas.

How cute would it be for them to share a room... on purpose?? :)

I started doing a little pinterest research to get some ideas for little girl's shared spaces.  I found the CUTEST sheet set, and after a little digging, realized they were still available at potterybarnkids.com! {But sadly, they aren't anymore!}
I got the sheets ordered, and planned the rest of the room around them.  I also ordered an extra pillowcase set to have fabric to play with for the rest of the room!

Deciding on beds was a little tricky-- one of my daughters was in a queen bed, which we saved for the new guest room, but the other was in a white bedroom set we'd bought years ago while we were living in another state at an Ashley furniture.  I hoped that Ashley would still carry the set, and I was so thrilled when they did!  I ordered another twin bed to match the one we already had and then planned on the girls being in side by side twins.  I know it takes up a lot more room than bunk beds, but I really love the look.  And this way, I don't have to worry about anyone falling off a top bunk! 

On Christmas Eve, we told the girls that they were having a special sleepover in the room we weren't making over.  After they were settled in, we went to work!  We moved everything out, painted the wall their beds were going to go against pink, assembled the new bed, and got everything into place.  It was a total whirl-wind experience, but we were so excited to surprise them. :)  We started about 8 pm and finished up by 12:30 am! 


 Originally, I had made two quilts for the beds with the material I had from the extra pillowcase set and some that I'd found to coordinate.  But when we put the new mattresses on the beds, they were bigger than the old one we'd had and the quilts didn't quite cover the bed the way I'd planned!  I was so bummed but knew the quilts would still be cute folded at the bottom of their beds.  I found these white quilt sets at overstock.com and love the way they look in the room!  The monogrammed shams are from potterybarnkids.com and they still have those available!
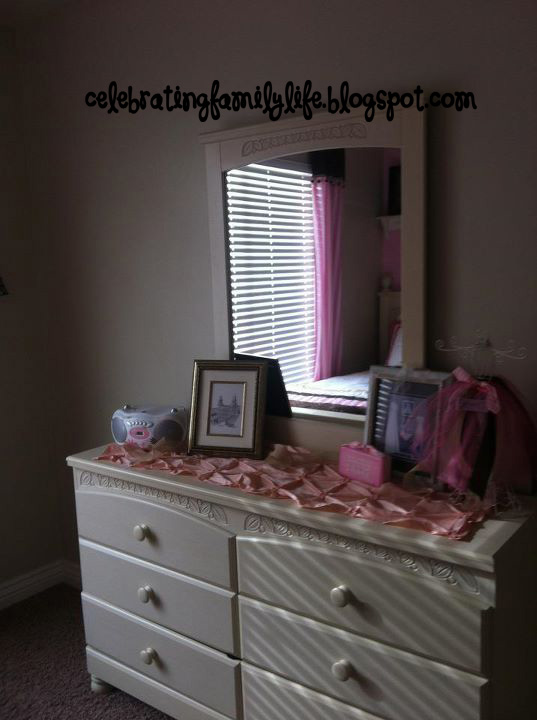
 Shot of the dresser-
The curtains I made and I was able to find some cute inexpensive Eiffel Tower accents at Hobby Lobby!  I also found gold frames and framed a baby picture of each girl to sit on a shelf about their beds. 


 Right near the door I hung both of the girls blessing dresses.  I made each dress while I was pregnant with my girls-- it's hard to believe that they are so big now! 

Christmas morning was the sweetest.  After we finished with the presents downstairs, I convinced the girls I had special Christmas outfits for them to wear to church that day up in the bedroom.  They came up with me {and my husband and son!} and were SO surprised when the door was opened!!  I loved their reactions, it made the months of planning and preparing so worth it! 

I have loved having them in the same room-- the sweet giggles and whispers at night just make me happy!

Monday, January 2, 2012

January Decorating

When we were growing up, my mom always had ALL of Christmas down for the New Year.  It's one of those things now that I do without even thinking about it.  I LOVE Christmas, but I also love how crisp, clean, and big my home feels after all of the extra decorations are packed away!

For the last few years, I have had a wreath dilemma after Christmas.  I love to have a seasonal wreath on my door- but what do you do after Christmas and before spring?

A winter wreath!


I made this wreath using things I found at my local Tai Pan-- I love that place!  I found the basic flocked wreath and added little pops of things to my basket that said "winter" to me as I walked around.  My favorite find was that metal ice skate! 

 When I got home, I just wired everything down to the original flocked wreath.


 Have a fun time with all of those winter whites and sparkly finds!  What says "winter" but not "Christmas" to you??


Sunday, January 1, 2012

Happy New Year!


Happy New Year!  We celebrated this year with a progressive party with some of our friends and neighbors.  We did the little kids part of the party at our home.  It was so much fun-- LOUD!-- but so fun!!  


One of my New Year Resolutions for 2012 is to become even more savvy in the kitchen.  I LOVE baking and cooking, and especially entertaining-- and I am excited to work on the essential skills every home chef needs to have mastered.  I've joined a weekly cooking blog group- bake52- where we are baking our way through a cookbook all year!  I'm excited to learn some new things and be forced to try recipies I might otherwise overlook. :)  I'll be posting on Wednesdays here about each week's cooking adventure!  

Hope you all had a great New Year's Day!